
You want a simple routine that makes you look rested and polished without spending an hour or buying 20 products. Here’s a realistic, beginner-proof plan that takes 10-15 minutes, works in everyday light, and survives a busy day (yes, even in Auckland’s humidity and wind). We’ll keep it natural, buildable, and easy to adjust for your skin type and style-no pro tricks needed, just repeatable steps you can learn fast. If you’ve ever felt overwhelmed in a makeup aisle, this is your calm, clear roadmap to makeup for beginners.
TL;DR: Quick Start-The Simple Routine
- Prep: Clean face → lightweight moisturiser → SPF 30+ (AAD and Skin Cancer Foundation recommend SPF 30 daily). Primer is optional.
- Base: Sheer skin tint or light foundation; spot-conceal only where needed; set T-zone lightly.
- Brows & Eyes: Brush brows and fill sparse areas; one neutral shadow; tightline or soft pencil; curl lashes + mascara.
- Cheeks & Lips: Cream or powder blush; optional bronzer; a hydrating lip colour or balm-stain.
- Lock & Check: Setting spray if you get shiny; fix smudges with a cotton bud and micellar water.
Step-by-Step: Your First Full Face in 10-15 Minutes
-
Prep the canvas (2 minutes)
- Clean: Start with a fresh face. If you washed earlier, a quick rinse or micellar water swipe is enough.
- Moisturise: Choose gel cream for oily, lotion/cream for dry. Give it 60 seconds to sink in.
- SPF: Use a teaspoon for face/neck if you’re outside; at least 1/4 teaspoon for face. Apply before makeup and let it set. In New Zealand, UV is intense even on cloudy days.
- Primer (optional): Mattifying for oily T-zones; hydrating for dry patches; pore-blurring just on texture.
-
Base-skin tint or foundation (3 minutes)
- Choose coverage: Skin tint (sheer), light foundation (everyday), or medium only if you want more polish.
- Apply less than you think: One pea-sized dot per cheek, a small dot on forehead and chin.
- Blend: Use fingers for speed, a damp sponge for seamless edges, or a buffing brush for quick polish. Always pull product down over the jawline to blend into the neck.
- Check daylight: Face a window and tilt your head-if you see lines, tap a damp sponge along edges.
-
Conceal only where needed (2 minutes)
- Under-eyes: Use a hydrating concealer 1/2 shade lighter than your foundation. Place just at the inner corner and a tiny dot at the outer shadow; blend with fingertip.
- Blemishes: Choose a concealer that matches your exact skin tone. Tap on, let it sit 10-15 seconds, then gently pat the edges.
- Redness: A thin veil around the nose and chin. Color corrector is optional; peach for blue/purple under-eyes, green for redness-but use the smallest amount.
-
Set the shine strategically (1 minute)
- Powder only the T-zone (sides of nose, center forehead, chin). Use a small fluffy brush so you don’t over-powder.
- Dry skin? Skip powder on the cheeks. Oily skin? Press powder in with a velour puff where you crease.
- Photos at night? Choose non-SPF powders to minimize flashback (silica-heavy powders can bounce flash).
-
Brows-your natural frame (1-2 minutes)
- Map quickly: Start = align from nostril to inner eye; arch = nostril to outer iris; end = nostril to outer eye corner.
- Fill only the gaps with hair-like strokes. Go one shade lighter than your hair if you’re dark, one shade deeper if you’re very fair.
- Brush through with a spoolie; set with clear or tinted gel to keep hairs in place.
-
Eyes-simple and bright (3 minutes)
- Shadow: Sweep a soft matte taupe or warm beige over the lid and slightly into the crease.
- Define: Tightline the upper lash line with a pencil (press between lashes) or smudge a brown pencil at the outer third.
- Curl lashes: Hold for 10 seconds. Apply mascara roots to tips, wiggling at the base for lift.
- Watery eyes or humid days? A tubing or waterproof mascara helps. The American Academy of Ophthalmology suggests replacing mascara every 3 months.
-
Cheeks-fresh, not flat (2 minutes)
- Blush first: Smile softly and tap on the apples, then sweep back toward the temple. Cream for dewy, powder for longevity.
- Bronzer vs contour: Bronzer adds warmth where the sun hits (top of forehead, temples, cheek perimeter); contour creates shadow just under the cheekbone. For beginners, start with bronzer only.
- Highlighter (optional): A fingertip tap on the top of cheekbones and inner corners of eyes-tiny amount.
-
Lips-hydrated and defined (1 minute)
- Pick a “my-lips-but-better” shade: two tones deeper than your natural lip.
- Line softly along your natural edge for shape. Fill with balm, tint, or creamy lipstick. Blot once with tissue for a lived-in look.
-
Lock it in and tidy (30 seconds)
- Setting spray: Hydrating for normal/dry, mattifying for oily. Spray in an X then a T.
- Clean edges: A cotton bud with micellar water erases mascara dots or liner wobbles fast.
Real life note: On windy Auckland mornings when my Golden Retriever, Max, insists on a beach run, I switch to tubing mascara and set my T-zone with a puff. Five minutes flat and it lasts.
Shade-Matching, Tools, and Starter Kit (with Examples)
How to find your foundation shade fast
- Test three stripes along your jawline: one you think matches, one slightly lighter, one slightly deeper. Blend and check in daylight.
- Match your face to your neck/chest so they look the same family. If your face is lighter than your body, match the body and warm up the face with a sheer layer.
- Undertone cues: Cool (pink/blue), Warm (gold/peach), Neutral (mix). Silver jewelry pops on cool tones; gold looks best on warm; both on neutral. Use this as a guide, not a rule.
- Can’t decide? Pick the closer depth first. You can adjust warmth with bronzer or a drop of mixing medium.
Brushes and tools you actually need
- Base: One buffing brush or a damp sponge.
- Concealer: Small flat brush or fingertip.
- Powder: Small fluffy brush (smaller gives control).
- Blush/Bronzer: Medium soft brush; use lighter pressure than you think.
- Eyes: One fluffy blending brush + one small shader; optional angled brush for liner/brows; spoolie for brows.
- Cleaning: Wash brushes weekly with gentle soap or brush cleaner; lay flat to dry with bristles hanging off the edge of a counter.
Beginner-friendly products by type (no brand commitment)
- Base: Skin tint or light foundation with a natural finish. Oily skin: oil-free, long-wear claims. Dry skin: hydrating, radiant finish.
- Concealer: Creamy, self-setting if you want fewer steps. One for under-eye (hydrating), one that matches skin for blemishes.
- Powder: Translucent pressed for on-the-go; loose for at-home, finer finish.
- Brows: Micro-tip pencil or tinted gel for quick shape.
- Eyes: Quad with matte beige, taupe, soft brown, and a satin sheen.
- Mascara: Tubing for smudge-prone, waterproof for events, classic for daily.
- Cheeks: Cream stick for fingertip blending or a sheer powder blush; warm bronzer one or two tones deeper than your skin.
- Lips: Tinted balm, sheer lipstick, or soft matte crayon for crisp edges without fuss.
Three example looks (you can build on your base)
- 5-minute school/work run: Skin tint, spot conceal, T-zone powder, brow gel, a single neutral shadow, mascara, cream blush, tinted balm.
- Video-call polish: Light foundation, brightening concealer, soft bronzer for warmth, peachy or rosy blush, tightline upper lashes, a touch of satin shadow, a hydrating but pigmented lip.
- Evening upgrade: Add a deeper matte in the outer corner, a thin wing or smudged liner, more mascara, slightly bolder blush, and a richer lip colour. Set with a long-wear spray.
Checklists & Cheat Sheets
Order of application
- Skincare → SPF → Primer (optional) → Base → Concealer → Powder (T-zone) → Brows → Eyes → Cheeks → Lips → Setting Spray.
- Cream products before powder products for the smoothest blend.
How much product to use (rule-of-thumb)
- Skin tint/foundation: 2-4 small dots total for sheer; 5-7 for light coverage.
- Concealer: Rice grain per area; add only if you still see what you want to cover.
- Powder: Dip, tap, press-no clouds. If you see dust in the air, you picked up too much.
- Blush: One brush dip per cheek, build in thin layers.
- Bronzer: One light sweep where the sun hits; add more only if needed.
- Setting spray: 3-4 spritzes in an X and T.
Shade quick picks
- Blush: Peach warms; rose brightens; mauve adds depth on cool tones; coral brings life on warm/medium/deep.
- Bronzer: Avoid too orange if you’re fair; avoid grey if you’re deep-look for rich, red-brown warmth.
- Lip “nude”: Match the depth of your gums or inner lip; avoid shades lighter than your skin or it can wash you out without liner.
Skin-type tweaks
- Oily: Use a mattifying primer in T-zone; choose oil-free base; press powder with a puff; carry blot papers.
- Dry: Skip powder on cheeks; mix a drop of moisturiser into your base; choose cream blush/highlighter.
- Combo: Powder only where you shine; cream on cheeks, powder on T-zone.
- Sensitive: Patch test on the jawline 24 hours before new products (DermNet NZ recommends patch testing for sensitive skin).
Brush care & makeup expiry
- Brush washing: Weekly for face and eye brushes if used daily; every 2-3 weeks if you wear makeup less often.
- Sponges: Rinse after every use; deep clean weekly; replace every 1-3 months.
- Expiry (typical PAO): Mascara/ liquid liner 3 months; liquid base/concealer 6-12 months; powders 12-24 months; lipsticks 12-24 months. If it smells off or separates weirdly, bin it.
Common beginner pitfalls
- Too much product too fast: Thin layers win. You can always add.
- Wrong light: Check near a window or step outside for 10 seconds.
- One brush for everything: Cross-mixing blush and bronzer muddies color. Keep a clean brush for final blending.
- Skipping SPF: It’s your real-life filter. AAD and NZ dermatologists push daily SPF 30+ for a reason.

Mini-FAQ, Troubleshooting, and Your Next Steps
Do I need primer? Not always. If your base slides off or your pores look obvious, try a targeted primer only where you need it.
SPF before or after foundation? Before. Give it a minute to set. Makeup with SPF helps but isn’t enough alone for daily protection.
How do I stop creasing under my eyes? Use less concealer, choose a hydrating formula, and set only the inner corner with the tiniest tap of powder. A thin eye cream under makeup helps.
My makeup melts in humidity. Switch to long-wear or matte base, use a gripping primer on the T-zone, set with powder, then lock with setting spray. Tubing mascara for smudging.
Foundation looks cakey. Use less. Blend with a damp sponge, especially around the nose and mouth. Add hydration (mist or moisturiser) before layering more product.
My shade looks off in photos. Check undertone and flashback. Avoid heavy SPF powders at night. Warm up with bronzer if you look pale; balance with a neutral blush if you look too warm.
Hooded eyes-liner keeps disappearing. Keep your eyes open while placing a thin line at the lash line; focus depth on the outer third with matte shadow. Waterproof pencil in the upper waterline adds impact without taking lid space.
Glasses wearers-anything different? Curl lashes well, use tubing mascara to avoid smudges on lenses, and add extra brightness at inner corners. Keep cheeks a touch higher so frames don’t hide the color.
Acne-prone skin-will makeup make it worse? Not if you remove it well and choose non-comedogenic formulas. Double cleanse at night. Spot-treat breakouts, but avoid layering heavy concealer on active spots-thin layers only.
Over 40-what should I tweak? Go thinner on foundation, creamier on textures, and keep powder pinpointed. Lift blush slightly higher; tightline for definition without heavy liner.
Quick decision helper
- If your skin shines by lunchtime → try oil-free base + T-zone powder + blot papers.
- If your skin looks dull or flaky → swap to hydrating base + cream blush + skip cheek powder.
- If shadow never blends → use an eye base and start with less product; windscreen-wiper motions with a fluffy brush.
- If lipstick feathers → use a clear lip liner or dab concealer around edges; blot and reapply.
Two-week practice plan
- Days 1-3: Master base and brows only.
- Days 4-6: Add the simple eye step (single shadow + mascara).
- Days 7-10: Add blush and a lip that makes you feel alive.
- Days 11-14: Play with liner or a slightly bolder lip for evenings.
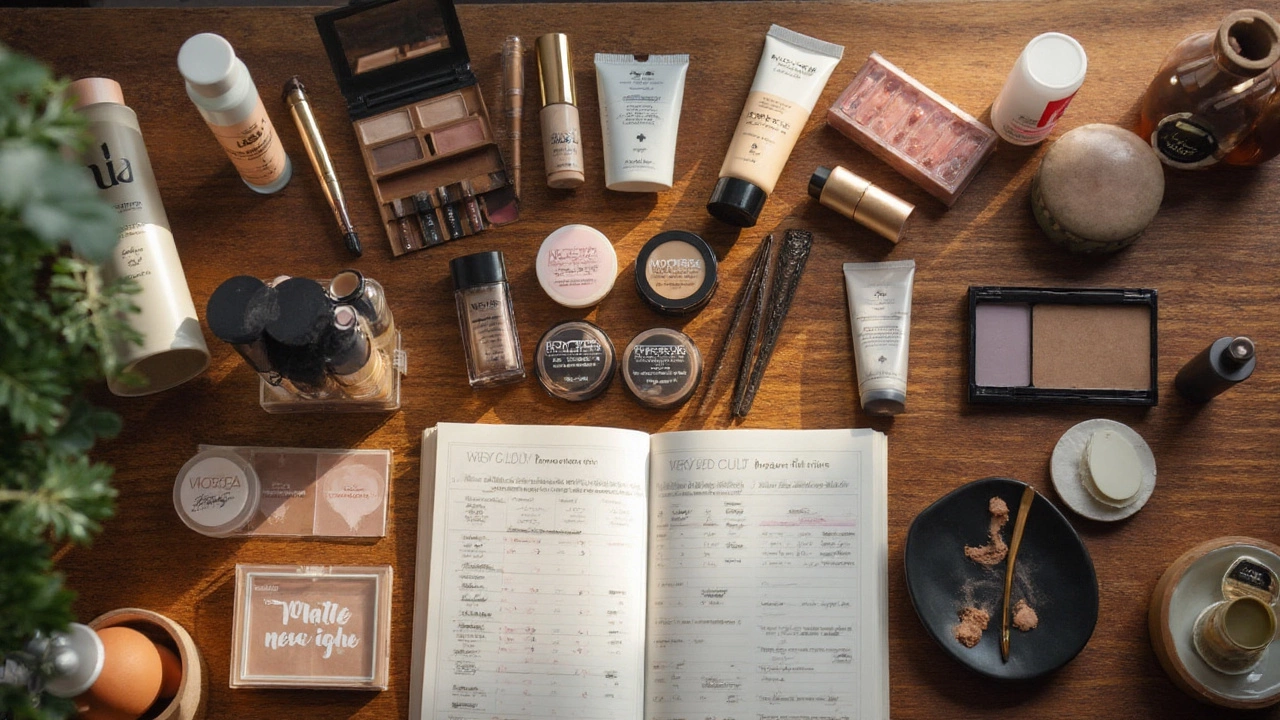
Beginner makeup kit (fits in a small pouch)
- Skin tint or light foundation; creamy concealer (one for under-eyes, one that matches skin).
- Translucent pressed powder; brow pencil/gel; neutral eyeshadow quad.
- Tubing or classic mascara; cream or sheer powder blush; warm bronzer.
- Tinted balm or soft matte lip crayon; setting spray suited to your skin type.
- Tools: Damp sponge or buffing brush, small powder brush, blush brush, fluffy eyeshadow brush, small shader, spoolie, angled brush (optional).
Safety and skin health notes
- Remove makeup every night-double cleanse if you wear long-wear or SPF. Your skin will thank you.
- Patch test new products, especially if you have sensitive skin (DermNet NZ guides safe testing).
- SPF 30+ daily, reapply if you’re outdoors. AAD and the Skin Cancer Foundation back this, and NZ’s UV index makes it non-negotiable.
- Eye products: Replace mascara every 3 months to reduce risk of eye irritation.
Once you’ve nailed this, the fun part starts-swapping a blush tone, trying a shimmer on the lid, or learning a tiny wing. Keep it light, keep it repeatable, and let the routine serve you, not the other way round. And if a gusty afternoon or a cheeky dog kiss throws your liner off, a cotton bud and a smile fix most things.